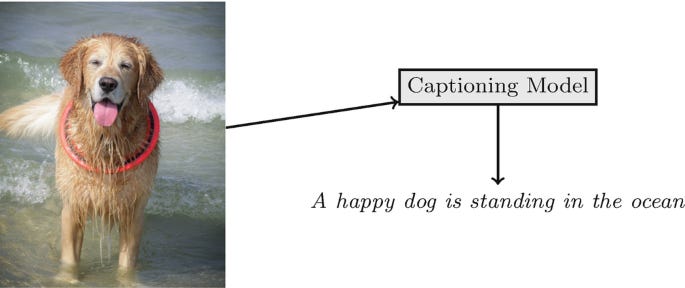
Image captioning is an AI task aiming to automatically generate descriptive textual descriptions for images. This capability finds applications in diverse domains such as accessibility tools, content indexing, and enhancing user engagement on social media platforms.
The Salesforce Blip Model, integrated within the Hugging Face Transformers library, represents a significant advancement in handling image-captioning tasks. Developed by Salesforce, this model leverages state-of-the-art techniques in computer vision and natural language processing to accurately describe visual content.
In this exploration, we will delve into both conditional and unconditional approaches to image captioning using the Blip Model. By demonstrating two distinct examples — one with a general condition and another with a specific condition — we aim to underscore the importance of providing context or guidance to the model.
This process not only highlights how a well-defined condition can enhance the relevance and accuracy of generated captions but also serves as a method to fine-tune and optimize the model’s performance for specific use cases.
Table of Contents:
Introduction to Image Captioning
Setting Up Working Environment
Loading the Model and Processor
Loading & Displaying the Image
Conditional Image Captioning
Unconditional Image Captioning
Trying Another Example with a Better Condition
My E-book: Data Science Portfolio for Success Is Out!
I recently published my first e-book Data Science Portfolio for Success which is a practical guide on how to build your data science portfolio. The book covers the following topics: The Importance of Having a Portfolio as a Data Scientist How to Build a Data Science Portfolio That Will Land You a Job?
1. Introduction to Image Captioning
Image captioning is a process where a textual description is generated for a given image. This task involves both understanding the visual content of the image and expressing it in natural language, combining computer vision and natural language processing techniques. Image captioning has a wide range of applications, from helping visually impaired individuals understand visual content to enhancing content-based image retrieval systems.
Key Components
Image Understanding:
Object Detection: Identifying and classifying objects within the image.
Scene Understanding: Recognizing the context and relationships between objects in the image.
Activity Recognition: Determining any actions or events happening within the image.
2. Language Generation:
Vocabulary Selection: Choosing the appropriate words to describe the image.
Sentence Structure: Formulating grammatically correct and meaningful sentences.
Contextual Relevance: Ensuring the generated text accurately reflects the content and context of the image.
Techniques and Models
Convolutional Neural Networks (CNNs):
Used for extracting features from images.
Examples: VGGNet, ResNet.
2. Recurrent Neural Networks (RNNs):
Used for generating sequential data like sentences.
Long Short-Term Memory (LSTM) networks and Gated Recurrent Units (GRUs) are popular choices.
3. Attention Mechanisms:
Allow the model to focus on different parts of the image when generating different parts of the caption.
Example: Show, Attend, and Tell model.
3. Transformers:
Recently, transformer models have shown promising results in both image processing and language generation.
Example: Vision Transformers (ViTs) combined with traditional transformers for text generation.
2. Setting Up Working Environment
Let’s start by setting up the working environments. First, we will download the packages we will use in this article. We will download the Transformers package and the torch package to use Pytorch.
!pip install transformers
!pip install torch
3. Loading the Model and Processor
We will need to load the model and the processor to perform the task. First, to load the model, we need to import the BleepForImageTextRetrieval class from the Transformers library.
Then, to load the model, you just need to call the class we imported and use the from_pretrained method to load the checkpoint. We will use the Bleep model from Salesforce for this task, and this is the related checkpoint for this specific task.
from transformers import BlipForConditionalGeneration
model = BlipForConditionalGeneration.from_pretrained(
    "./models/Salesforce/blip-image-captioning-base")
Next, we will import the AutoProcessor class from the transformers library which is a convenient tool for handling preprocessing tasks such as tokenizing text and processing images to prepare them for model input.
from transformers import AutoProcessor
processor = AutoProcessor.from_pretrained(
    "./models/Salesforce/blip-image-captioning-base")
4. Loading & Displaying the Image
Next, to display the image in a Jupyter Notebook or similar environment, you can use the Image class from the PIL
from PIL import Image
image = Image.open("./gaza_under_fire.jpg")
image
If you are running this code outside a Jupyter Notebook, simply load the image with Image.open will not display it. Using matplotlib or another image display library will ensure the image is shown correctly.
5. Conditional Image Captioning
To generate image captions using the BLIP model and the AutoProcessor from Hugging Face's transformers library, you need to pass both the image and the text prompt to the processor.
Running this code below will display the image and print the tensor representations of the processed inputs. These inputs can then be used with the BLIP model to generate captions or perform other tasks.
text = "a photograph of"
inputs = processor(image, text, return_tensors="pt")
inputs
{'pixel_values': tensor([[[[-1.6609, -1.6755, -1.6755, ..., -1.6609, -1.6609, -1.6609],
[-1.6755, -1.6609, -1.6755, ..., -1.6463, -1.6463, -1.6609],
[-1.6755, -1.6755, -1.6755, ..., -1.6171, -1.6317, -1.6463],
...,
[-1.7631, -1.7631, -1.7485, ..., -1.7631, -1.7485, -1.7485],
[-1.7777, -1.7631, -1.7631, ..., -1.7631, -1.7485, -1.7485],
[-1.7777, -1.7631, -1.7631, ..., -1.7485, -1.7485, -1.7631]],
[[-1.6921, -1.7071, -1.7071, ..., -1.6921, -1.6921, -1.6921],
[-1.7071, -1.6921, -1.7071, ..., -1.6921, -1.6771, -1.6921],
[-1.7071, -1.7071, -1.7071, ..., -1.6921, -1.6771, -1.6921],
...,
[-1.7521, -1.7521, -1.7521, ..., -1.7371, -1.7221, -1.7221],
[-1.7521, -1.7521, -1.7521, ..., -1.7371, -1.7221, -1.7221],
[-1.7371, -1.7521, -1.7521, ..., -1.7221, -1.7221, -1.7371]],
[[-1.4660, -1.4802, -1.4802, ..., -1.4660, -1.4660, -1.4660],
[-1.4802, -1.4660, -1.4802, ..., -1.4660, -1.4518, -1.4660],
[-1.4802, -1.4802, -1.4802, ..., -1.4518, -1.4518, -1.4660],
...,
[-1.4660, -1.4660, -1.4518, ..., -1.4802, -1.4802, -1.4802],
[-1.4660, -1.4660, -1.4660, ..., -1.4802, -1.4802, -1.4802],
[-1.4660, -1.4660, -1.4660, ..., -1.4802, -1.4802, -1.4802]]]]), 'input_ids': tensor([[ 101, 1037, 9982, 1997, 102]]), 'attention_mask': tensor([[1, 1, 1, 1, 1]])}To generate a caption for the image using the BLIP model with the processed inputs, you can use the generate method of the model. After generating the output, you can decode it to get the caption.
out = model.generate(**inputs)
out
tensor([[30522, 1037, 9982, 1997, 1037, 2543, 7384, 1999, 1996, 2305,
3712, 102]])Finally to decode the output using the processor.decode method to get the caption in a readable format. Here's the updated code with the decoding and printing of the generated caption
print(processor.decode(out[0], skip_special_tokens=True))a photograph of a fireball in the night sky
We can see that the caption is very generic, although it describes the image in general. However, it did not provide a more specific caption describing the real caption which is Israel bombing Gaza. Maybe it needs fine-tuning to provide a more realistic caption. Another possible solution we can also provide more guidance in the guidance text.
6. Unconditional Image Captioning
Let's try Unconditional Image Captioning. This refers to a type of image captioning task where the model generates captions for an image without any specific guidance or additional input beyond the image itself.
In other words, the model generates captions solely based on the visual information present in the image, without being given any explicit prompts or cues about what the caption should focus on or describe.
We will follow the same steps as in conditional image captioning but without giving a text argument to the processor method.


